
Repurposing old windows is an increasingly popular project that not only recycles materials but also adds a unique touch to home decor. Whether you have a couple of dusty panes lying around in your garage or you’ve found some at a flea market, transforming them into a stunning succulent frame can create an eye-catching focal point. In this guide, we will walk you through the steps of creating a designer-style succulent frame using old windows, all while adding a touch of greenery to your living space.
Why Choose Succulents?
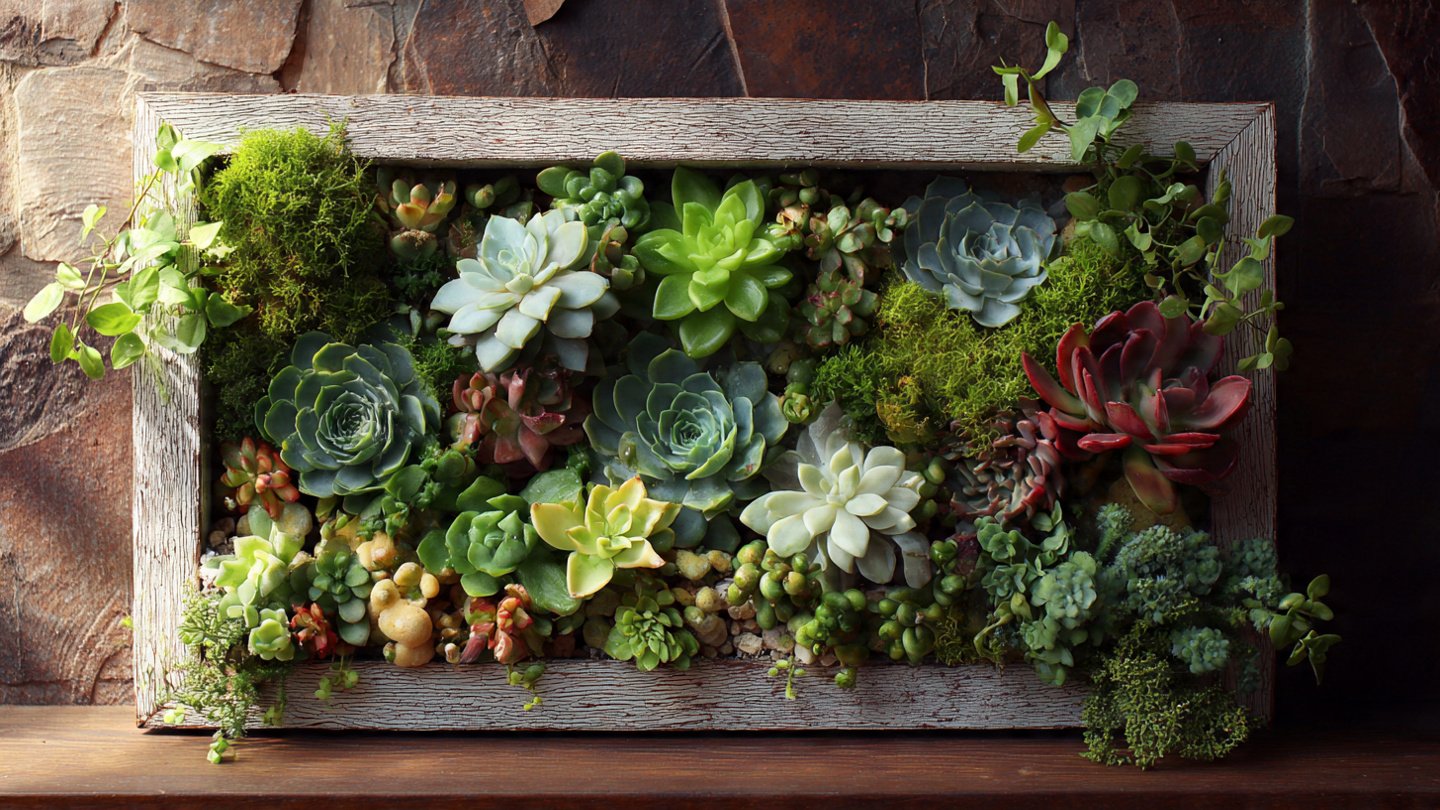
Succulents are a wonderful choice for framing due to their unique shapes and colors. They are low-maintenance, drought-resistant, and beautifully diverse, offering a stunning array of textures and hues. Additionally, their adaptability makes them ideal for various climates and living conditions. This makes the succulent frame a versatile and appealing option for household decor.
Materials You Will Need
- Old window frames (ensure they are clean and intact)
- Wire mesh or chicken wire (for securing the plants)
- Potting soil (suitable for succulents)
- Succulent plants of your choice
- Wooden plank, if you need extra support
- Spray paint (optional, for a decorative touch)
- Wood glue or screws (to reinforce the structure)
- Drill (if necessary)
- Gloves (to protect your hands during assembly)
- Water for the plants
Step-by-Step Guide
Step 1: Clean and Prepare the Old Windows
Start by cleaning the old windows thoroughly. Use a glass cleaner to remove dirt, grime, and any stickers. Check for cracks and damage; if necessary, repair any damaged areas. Remove any old paint or hardware that may hinder your project. If desired, you can spray paint the frame in a color that matches your home’s decor.
Step 2: Cut and Attach the Wire Mesh
Once the windows are clean and dry, cut wire mesh or chicken wire to fit the back of the window frame. This will serve as the support system for your succulents. Use wood glue or screws to attach the wire securely to the frame.
Step 3: Prepare the Succulent Soil
Fill the frame with potting soil, ensuring there is enough to support the roots of the succulents. It’s best to use a soil mix specifically designed for succulents to ensure proper drainage. Avoid using regular potting soil, which can retain too much moisture.
Step 4: Arrange and Plant the Succulents
Before planting, arrange the succulents on top of the soil to visualize how they will look. Play with different arrangements until you’re satisfied with the design. Following your layout, carefully plant each succulent into the soil, ensuring their roots are adequately buried. Be mindful of the spacing between plants, as they will grow over time.
Step 5: Add Finishing Touches
After you’ve planted the succulents, you can add decorative elements like small stones or pebbles on top of the soil for added aesthetic appeal. This not only enhances the design but also helps with moisture retention.
Step 6: Watering and Maintenance
Once you have completed your succulent frame, water the plants lightly. Ensure that you do not overwater as succulents thrive in drier conditions. Place the frame in an area with indirect sunlight, as too much direct sunlight can scorch the plants. Monitor the moisture level and water sparingly, as succulents prefer to dry out between waterings.
Creative Ideas for Your Succulent Frame
- Layered Frames: Use multiple frames stacked on top of each other for a 3D effect.
- Color Theme: Choose succulents in varying shades of a single color for a cohesive look.
- Seasonal Decorations: Change out the plants seasonally or add small decor items like miniature pumpkins in the fall or ornaments during the holiday season.
- Add a Quote: Paint a motivational quote at the top of the frame to add an inspiring touch.
Where to Place Your Succulent Frame
Your newly created succulent frame can serve as an artistic display in various places. Here are some ideas for where to showcase your frame:
- Entryway: Greet guests with a vibrant frame as they enter.
- Living Room: Place it on a mantelpiece or hang it on the wall for a striking visual.
- Office: Brighten your workspace with a touch of greenery.
- Outdoor Patio: Create a charming garden display by placing it on a table or hanging it on the wall.
Conclusion
Transforming old windows into a stunning designer-style succulent frame is not only a sustainable project but also a creative way to enhance your living environment. With just a few materials and a bit of ingenuity, you can create a unique piece of decor that showcases the beauty of succulents. This project not only beautifies your space but also allows you to express your creativity and individuality. So, roll up your sleeves, gather your materials, and get started on your succulent masterpiece!
FAQs
1. Can I use other types of plants instead of succulents?
Yes, you can use other plants, but it’s essential to select ones that have similar watering and light requirements as succulents for optimal growth.
2. How often should I water my succulent frame?
Watering frequency can vary based on your climate and the plants used, but generally, succulents should be watered every two to three weeks. Always check the soil moisture before watering.
3. What if my succulent frame starts to look overgrown?
If your succulents begin to overcrowd the frame, consider pruning them back or replanting them into individual pots.
4. Can I hang the frame outside?
Yes, you can hang the frame outside, but be mindful of severe weather conditions. Ensure that the frame receives the right amount of sunlight based on the succulent types.
5. How do I prevent pests in my succulent frame?
Regularly check your plants for signs of pests, and consider using natural deterrents like neem oil if you notice any infestations.